Metalcasting by 3D Printer
Published on in 3D Printing
Starting at the End
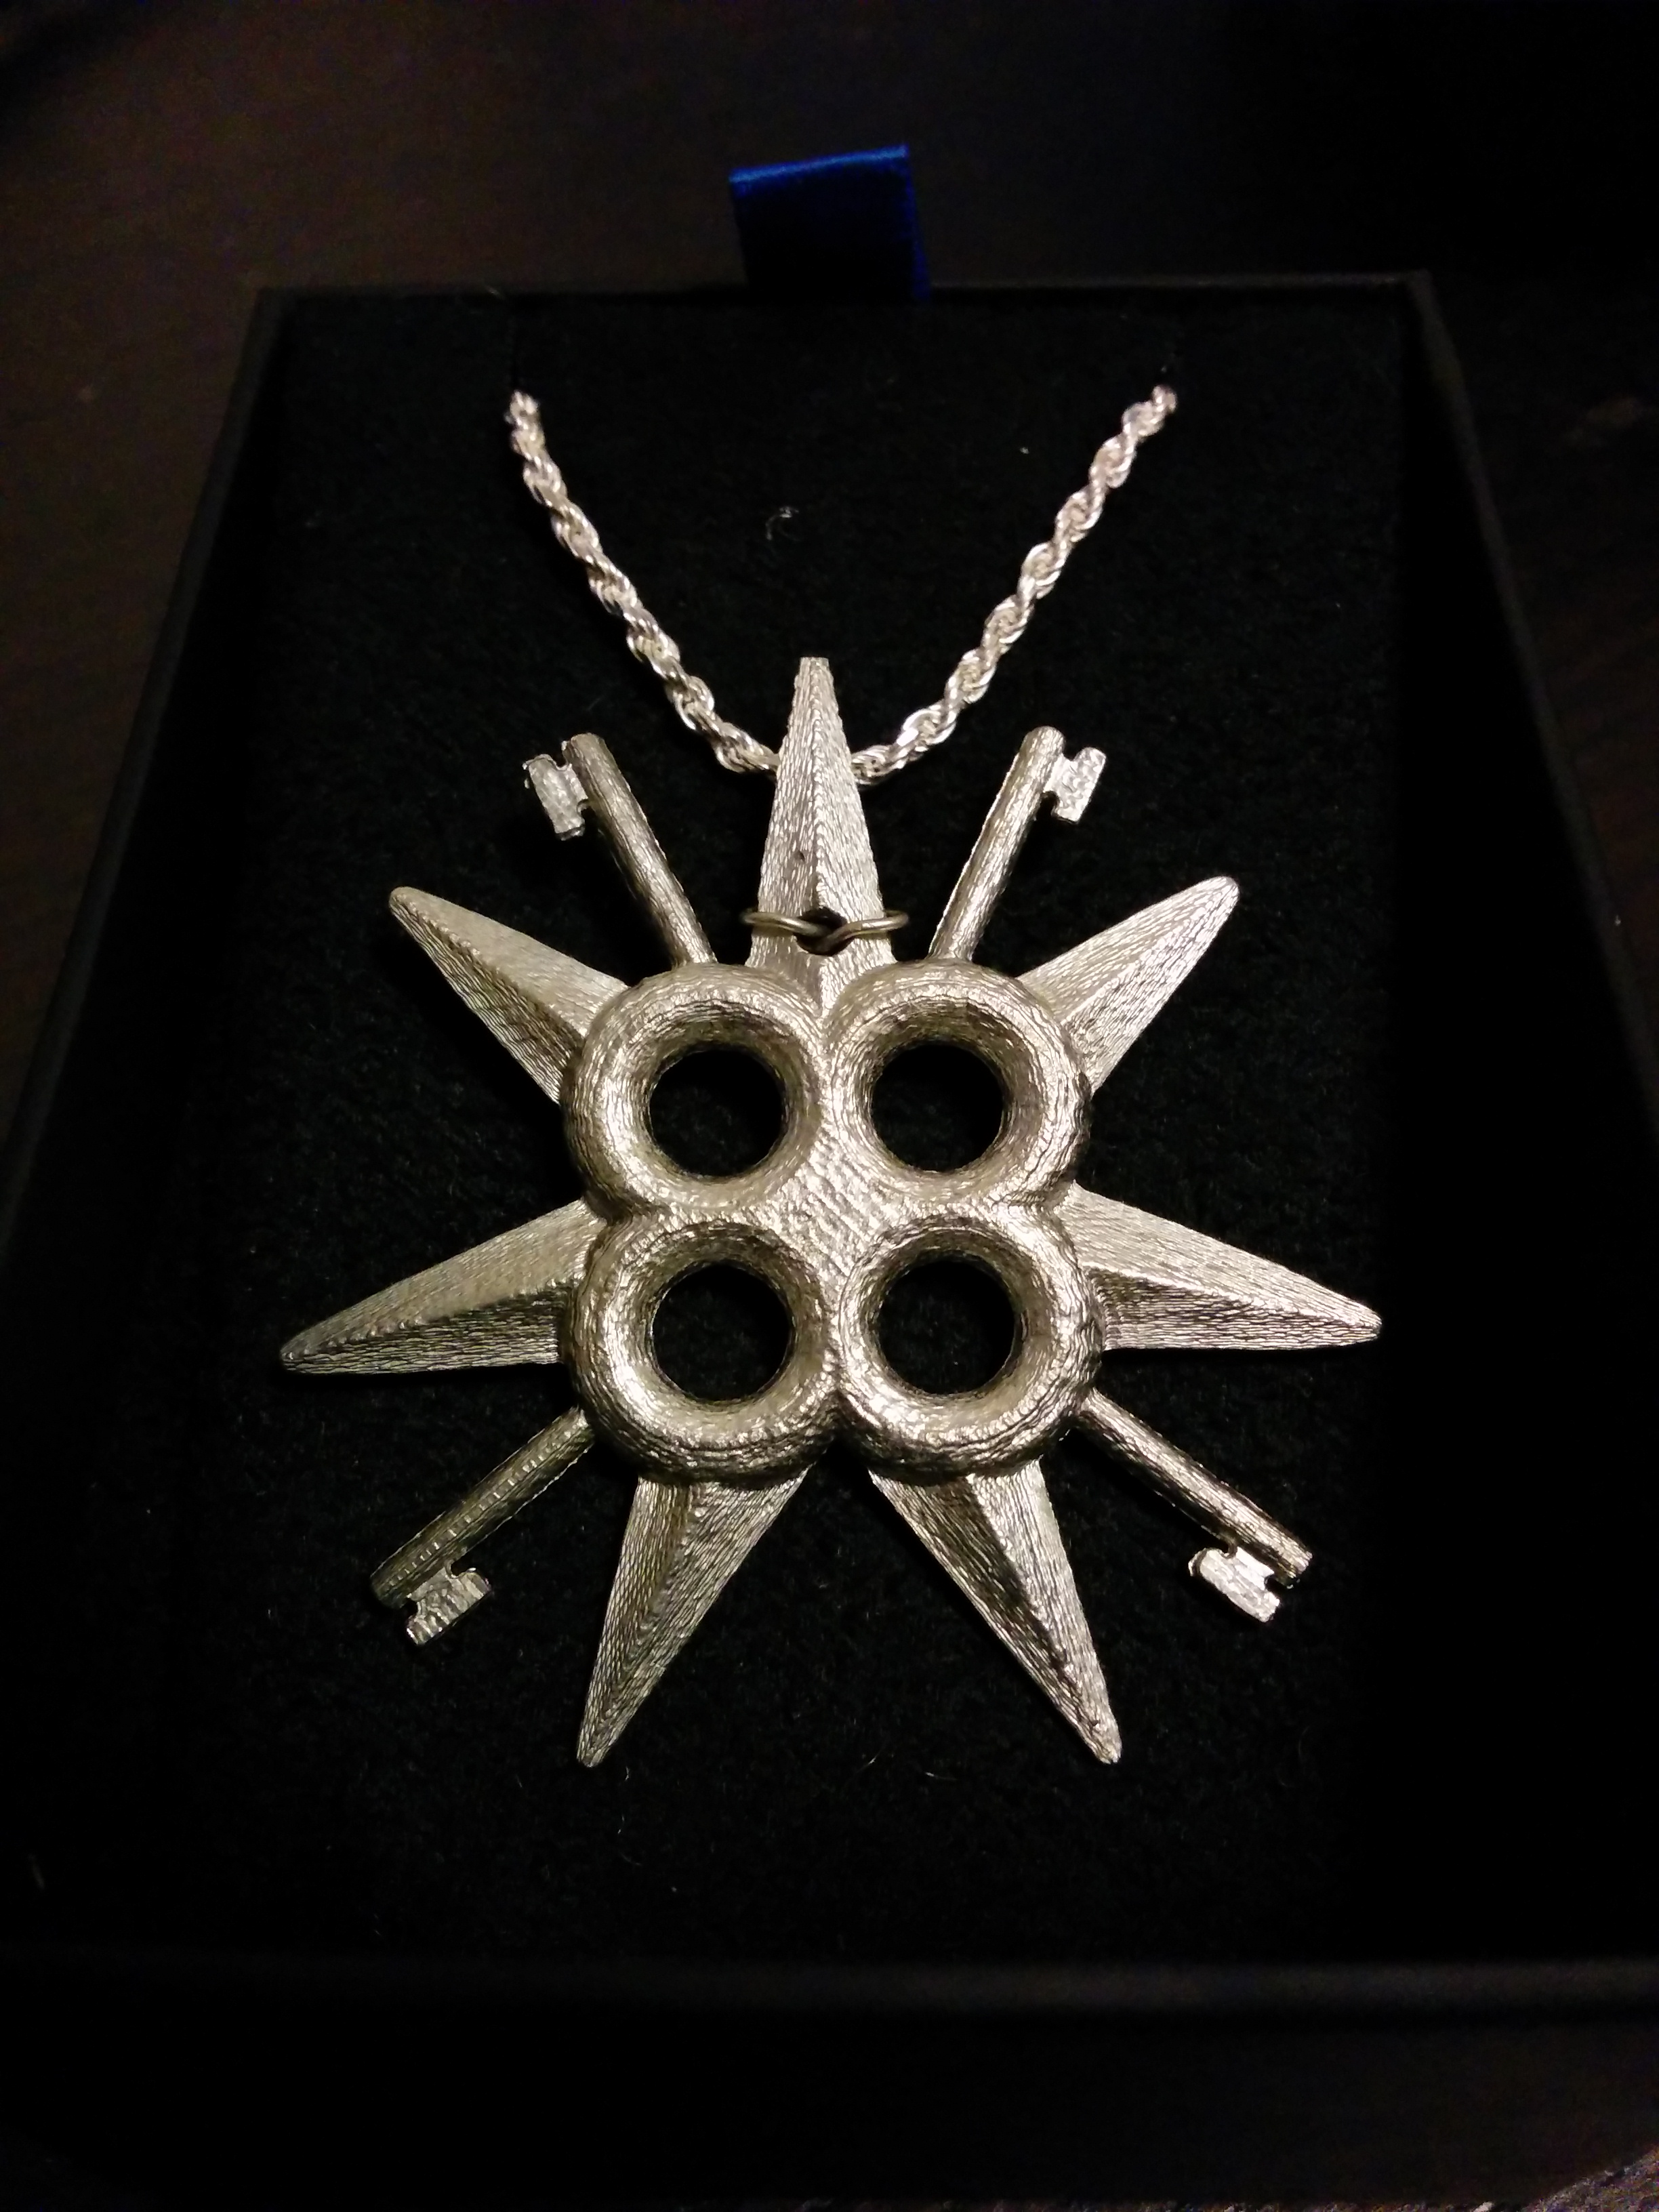
I used 3D printing to create a pendant for a friend. The steps I took are below. However, I’m so excited about the end product that I wanted to start by showing it off.
The Adventure Begins
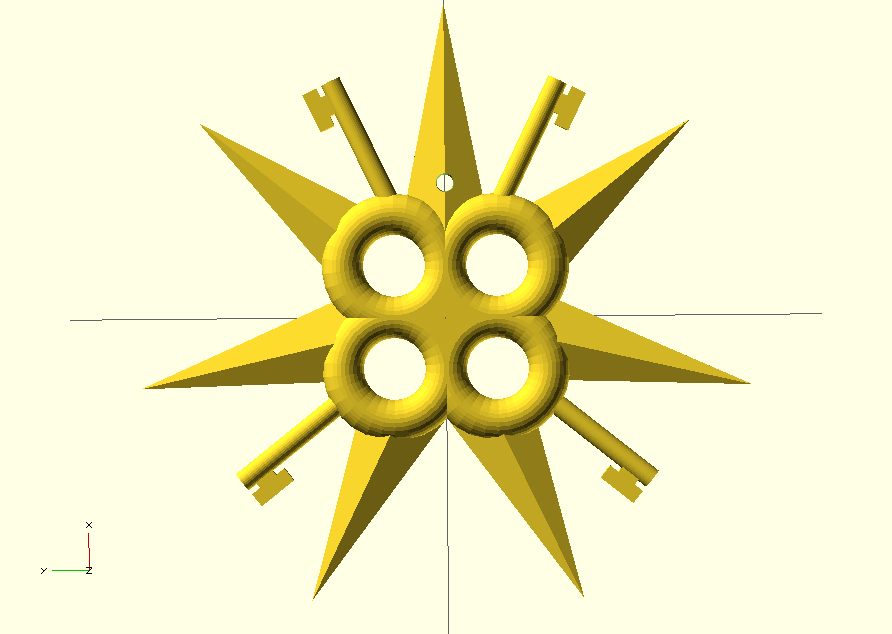
On a whim, I asked a friend to give me an idea for something to 3D print. She’s a huge fan of Garth Nix’s Abhorsen series and admires the Clayr. She suggested creating a pendant based on their sigil. After a couple hours work, I had this:
From here, I started thinking about how nice it would be to have this in metal - to make it into a proper pendant that she could wear. After quite a bit of looking online, I settled on trying to cast it in a low-melting point alloy. These are usually used in thermal fail-safes in industrial machinery, rapid prototyping or die-casting.
Many of these alloys contain lead - obviously an issue for something that is to be worn. The most prominent non-toxic option is Field’s Metal. However, that stuff is EXPENSIVE. See an amazon listing for $90 + shipping per quarter-pound. After looking around more, I was able to find an unnamed bismuth-tin alloy for $20/pound + shipping. This turns out to be a better choice in pretty much every way.
Field’s metal melts at 62°C/144°F - In some parts of the world, that’s a warm day. It’s a temperature that people are unlikely to be exposed to, but which a reasonable person might be exposed to in their life. It also happens to be under the boiling point of water, meaning that if one were cooking wearing something made of Field’s metal and accidentally dipped it in boiling water, it would start to melt immediately.
This bismuth-tin alloy melts at 138°C/281°F. Too hot for a normal person to expect any lengthy exposure. I wouldn’t recommend reaching into an oven wearing this stuff, but it would probably survive.
Please do note that although this alloy is non-toxic, this is NOT the same as food-safe. Bismuth is used in solder for potable water systems, in medicines and cosmetics. We probably come in contact with quite a lot of it and it seems to generally be considered safe if ingested in small quantities. Tin also is considered generally safe, though some (specially manufactured) compounds are highly toxic.
In short, you’ll be okay if you ingest small amounts of this metal, but don’t use it for anything that will come in contact with food, go under your skin or result in prolonged ingestion/exposure (contact with skin excluded). Long term exposure probably won’t harm you, but I’m not willing to bet my body or life on “probably”.
Procedure
-
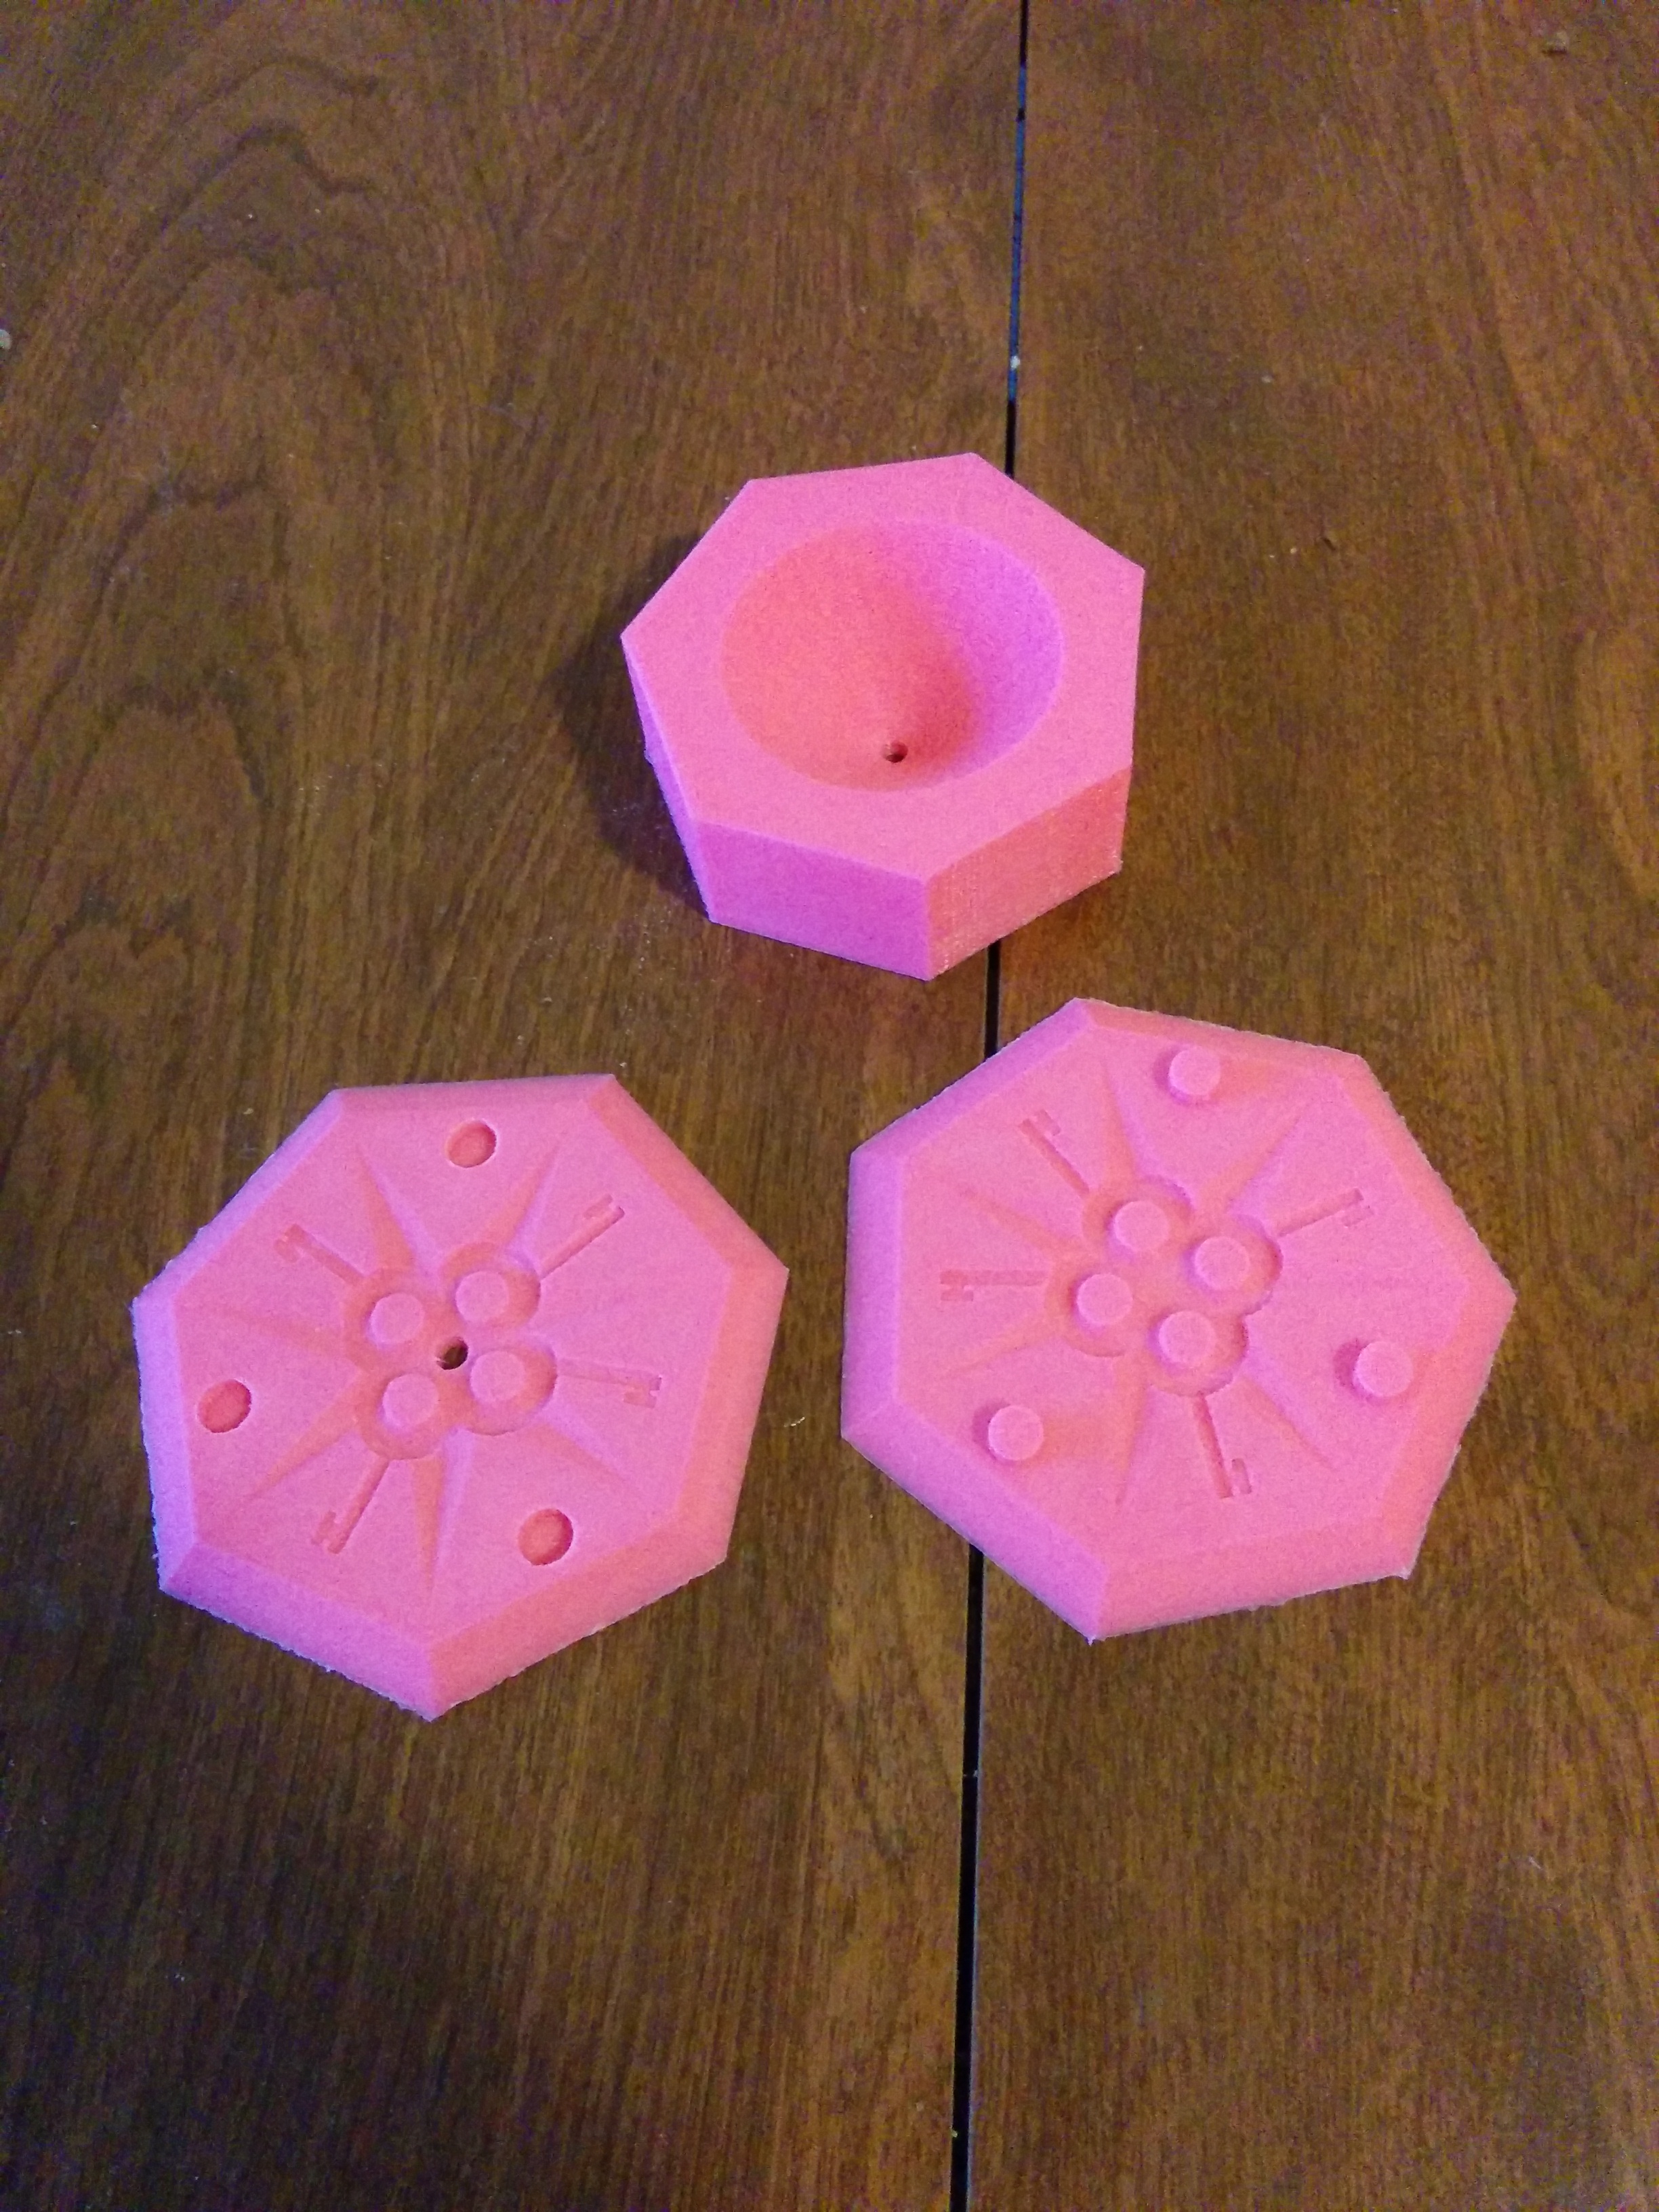
Print the parts. The 3D models are available on thingiverse. For the mold parts (the two flatter ones), I’m currently using 0.05mm layers, 0.8mm thickness for all dimensions and 8% infill. These settings may need adjustment for your printer - but should provide a good starting point. For the funnel I’m using much less precise settings - 0.15mm layers, with other settings about the same as for the mold. The funnel does not affect the final shape of the pendant, so it can be printed much more roughly. These are the parts as I printed them:
-
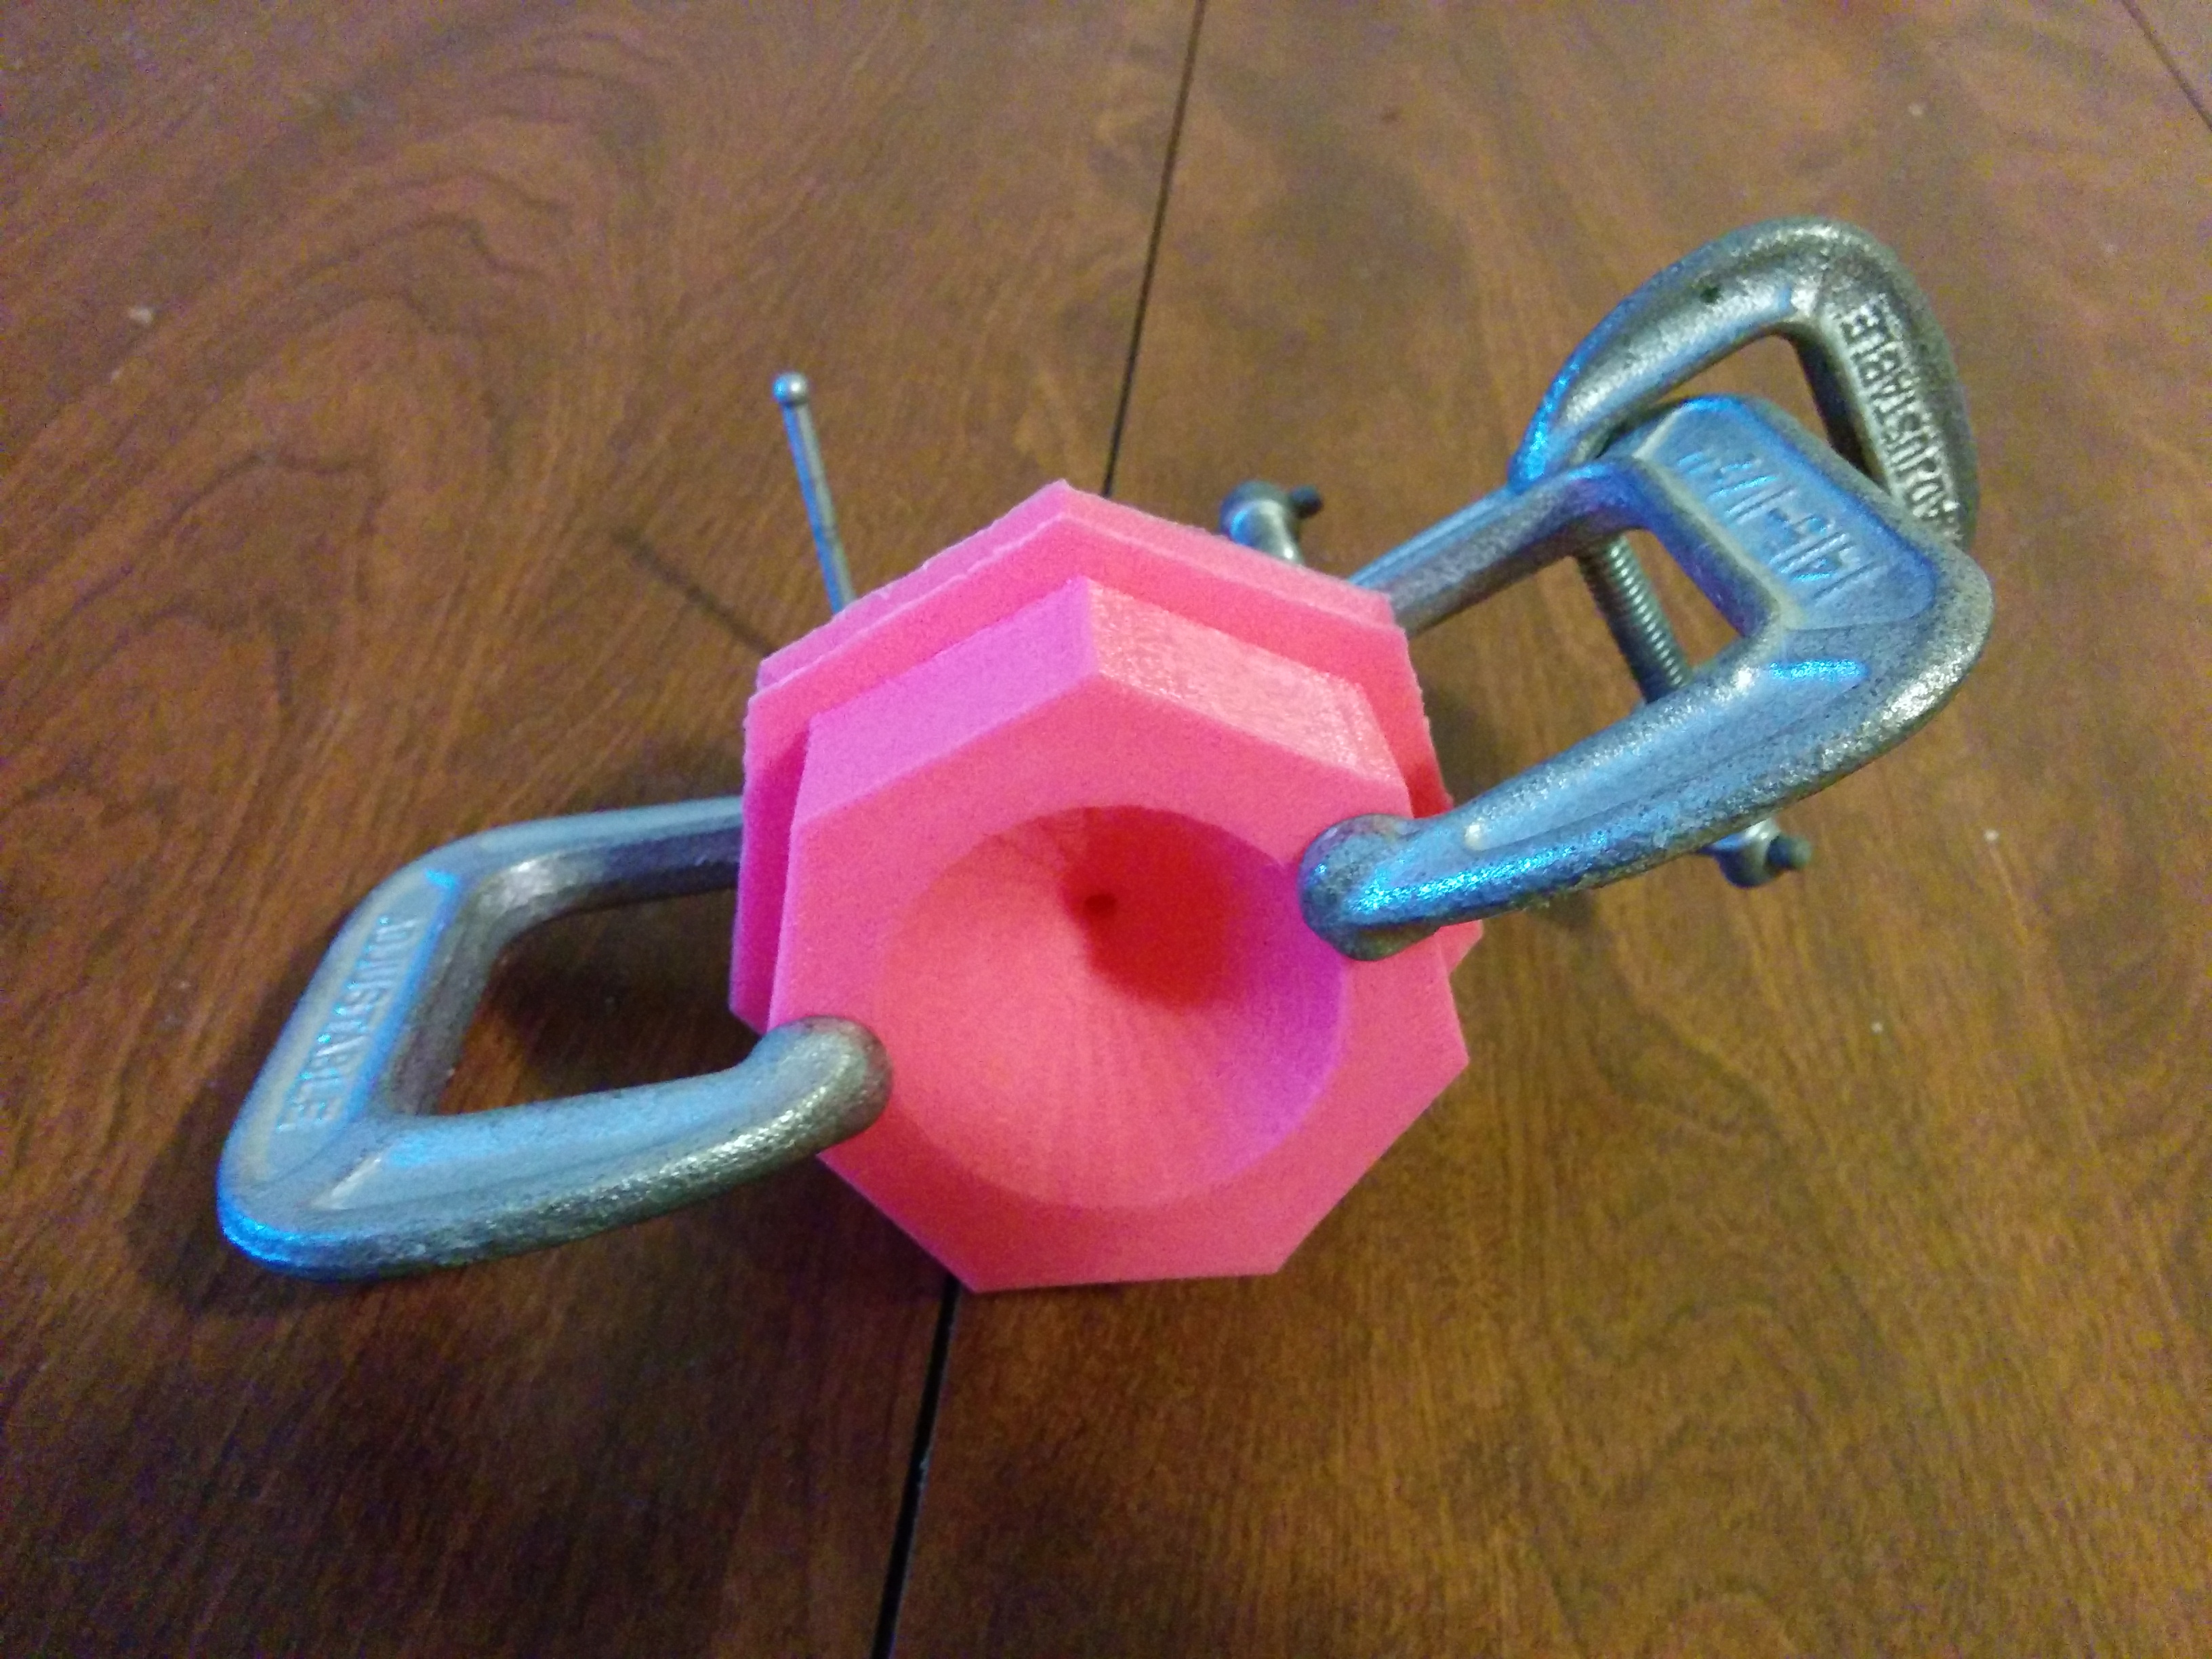
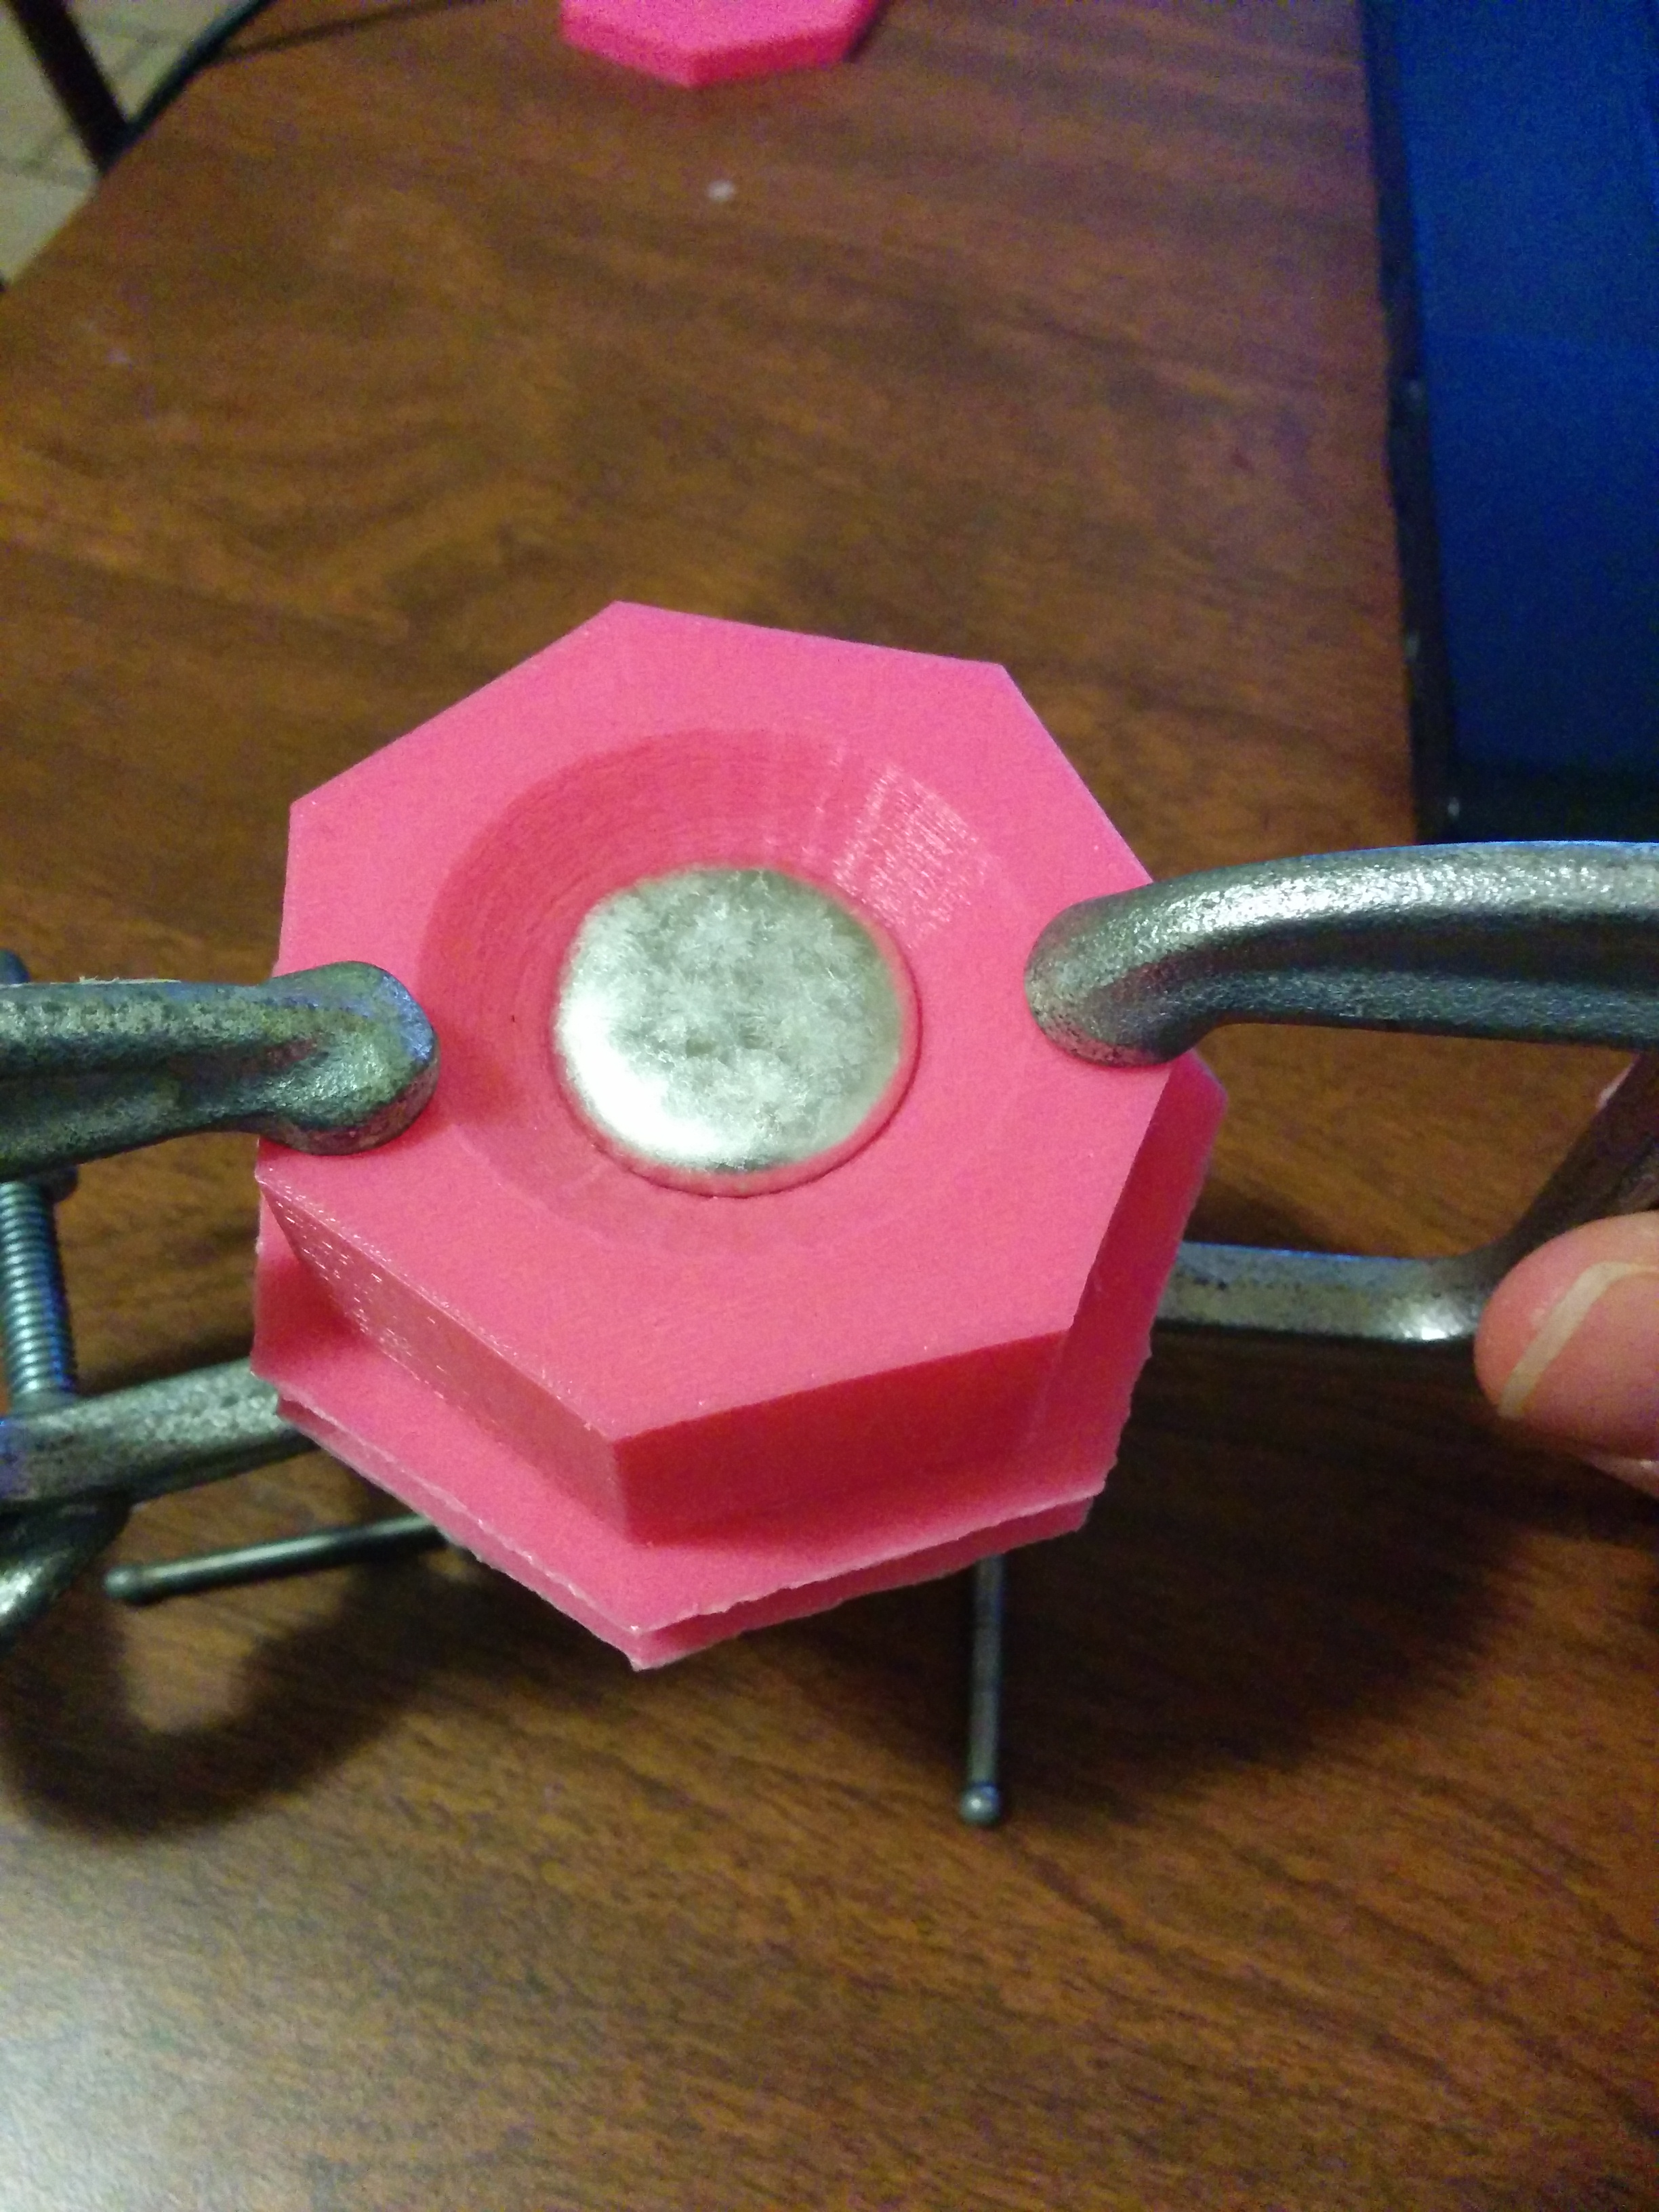
Clamp the parts together: Make sure that the holes in the funnel and the mold are aligned:
-
Cool all the molds in the freezer for at minimum 3 hours. Don’t remove them until as close to when you’re going to pour the metal as possible.
-
Melt the metal. THIS STEP CAN BE DANGEROUS. Always wear safety gear - at a minimum eye protection and gloves that can handle the temperatures. (Oven mitts work wonderfully).
Any way you can heat the metal is sufficient. Ideally, use a chemistry lab quality glass beaker and a hotplate. If you don’t have access to these, I suggest a flat-bottomed Pyrex bowl on the stove, although I’ve seen it work with ceramic and glass containers. Stay away from the stove while the metal is heating, in case the container has a flaw that causes a catastrophic failure (that is, it explodes. I haven’t seen this happen, but it is a risk). If you have an extractor fan of any kind, use it. If not, open a window and point a fan outside. Finally, DO NOT quench or dip in water the container of metal. Let it cool in its own time.
-
Set up the area around the mold. Raise the mold and clamps up above a container that can catch any spilled metal. Again, use glass or ceramic containers.

This setup ensures that if the mold’s bottom fails (it’s happened - but not if I freeze the molds) the metal is contained in a container that can handle it and will allow you to reuse the spilled metal.
-
Pour the molten metal. Pour metal slowly into the funnel until the funnel is about half full and the liquid level stops dropping.
-
Agitate. The mold needs slight agitation as the metal cools. This agitation helps remove any residual air so the metal can fill the entire mold. I found that picking up the molds by the clamps and giving them small shakes for about 30 seconds worked extremely well.
-
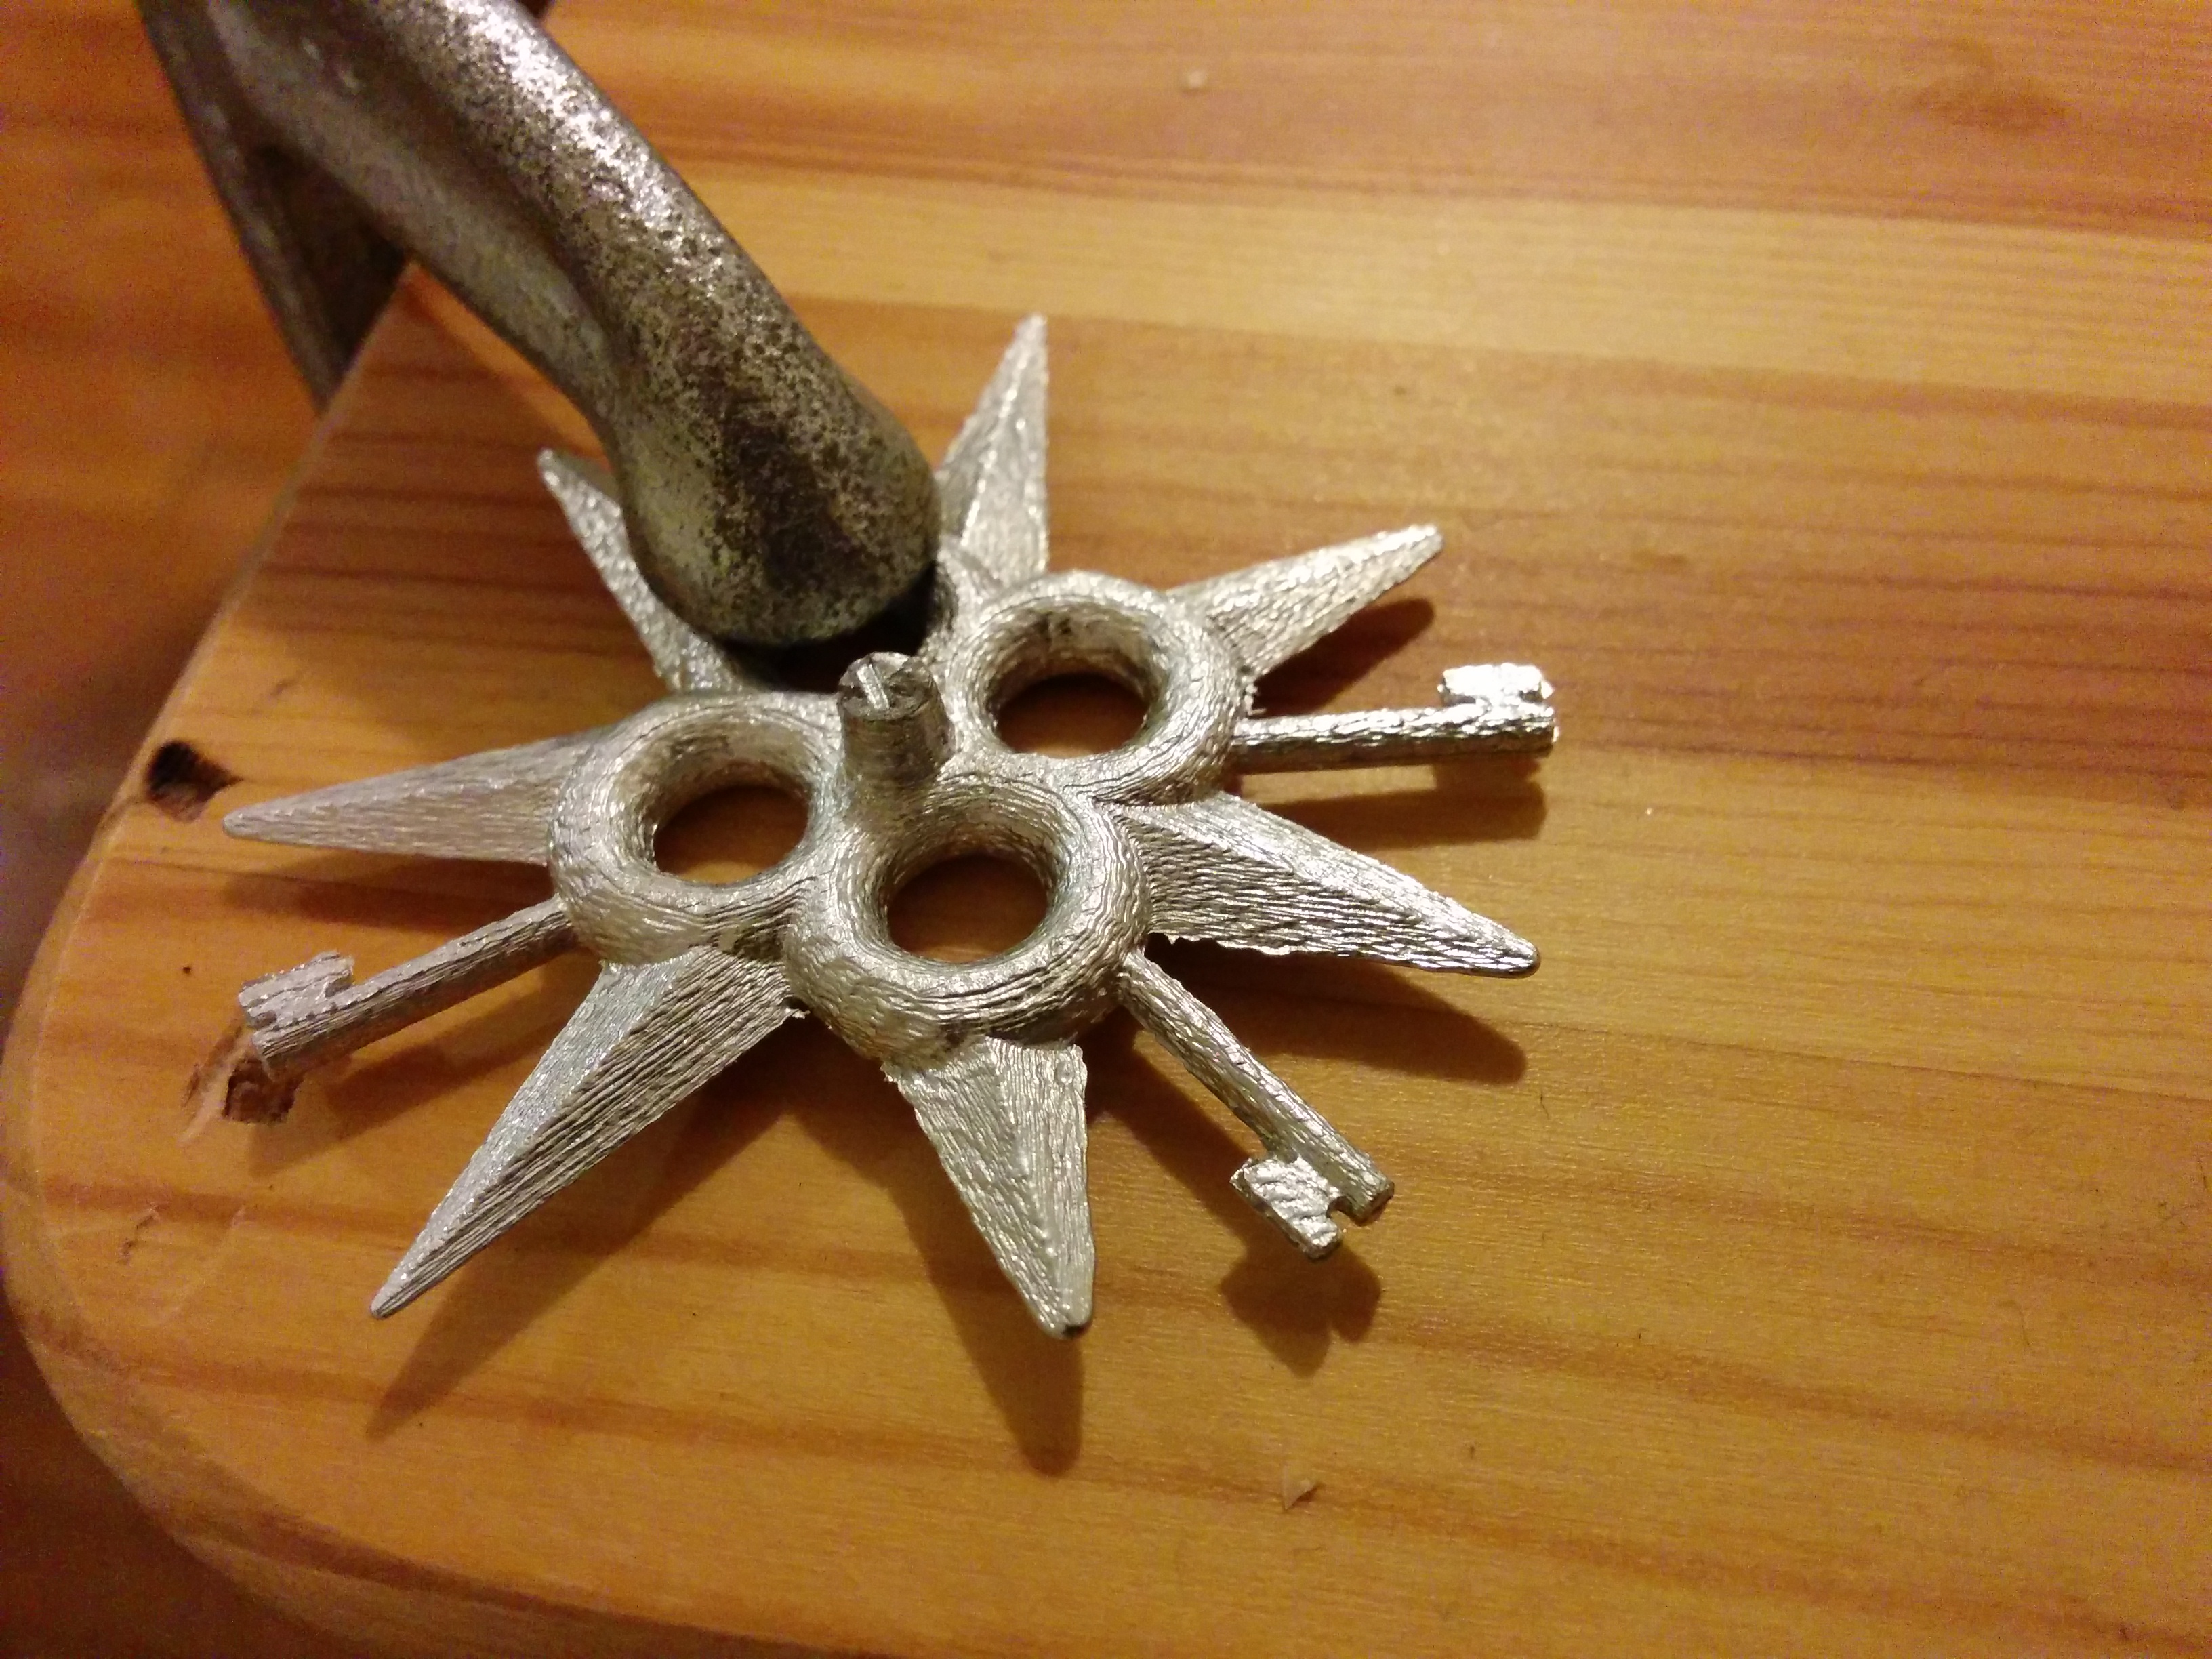
Wait. Wait until the metal in the funnel is solid and warm to the touch (rather than hot). After this, the molds will look like this:
-
Remove the funnel from the other mold parts. Start by removing the clamps. The funnel will be stuck to the two smaller pieces of the mold by a small cylinder of metal. In my experience, twisting the funnel will remove it. The separated parts will look like the below picture - in which you can see the small cylinder that was connecting the molds to the funnel.

-
Freeze for 3+ hours. This will cause the metal to shrink (and it shrinks more than the plastic) which will make the final part easier to remove.
-
Remove the part from the mold.
A. Method 1: The first half is easy to get off - you ought to be able to, with some resistance, pry half of the mold off. The other half is more complicated. Put your thumbs in the center of the backside, grab the edges with your fingers, and bend the mold as if you were trying to push the metal out from the back. Repeat several dozen times, rotating the mold between attempts. Very quickly you should see all the points and all the keys come loose, so you can bend the mold and they don’t bend. Further bends are to loosen the center, which eventually pops out. If needed, freeze the mold again. Make sure the part has somewhere soft to land - I broke several by popping them out onto a hardwood floor.
B. Method 2: Cut the metal free. If you don’t care about reusing molds, this may be easier. The methodology for cutting the mold is up to you. But be mindful of exposing the metal to heat, if you choose to use a heat-based method.
The removed part should look something like this (shown clamped down for the next step):
-
Cut off the nub on the back. Removing the pendant from the mold leaves a metal nub on the back of the pendant. I used a Dremel cutting disk to grind it off, though many methods will work. This is what mine looked after removing the nub:

-
Hang. Hanging the pendant is another place where you get to choose the methodology. My favored method is to use jeweler’s wire by cutting a length, folding it in half and running it through the small hole in the top-most point. Then I bend the two ends back around to the side that now has the loop and solder them together. This way it can be hung on either a continuous chain or a chain with a clasp.
-
Celebrate. You now have a custom pendant! The .scad file should be adaptable to many different shapes. Play around, but expect some difficulty - OpenSCAD doesn’t let you query some properties, meaning that you’ll have to adjust them manually.
Observations and Limitations
This section documents some general notes and observations on the mold and process. Some of these are limitations on how this process and the .scad file used to generate the mold.
The first observation is that there is a massive quality increase achieved by freezing the mold. In unfrozen molds, I observed some melting - after one use they were totally unusable for further castings. This is caused by the transfer of thermal energy from the metal to the plastic in the process of cooling. The plastic has what’s called a glass transition - basically it becomes soft and malleable - at about 60°C. Room temperature is ~25°C and freezing is 0°C. So by cooling the mold to freezing or below, we’re changing how much thermal energy is required to melt the plastic - thus forcing the metal to cool more before it can do so. This does mean that molds which enclose areas with a high volume to surface area ratio run a higher risk of melting the mold.
The method I’m using to generate the molds only works for objects which are both symmetrical and where the projection of the object is equal to or enclosed by the shape created by taking a slice though the center. Obviously, it is possible to make molds for more complicated shapes. However, this scad file won’t do it for you. In the future, I plan to do more work and possibly generate a scad file (or other program) which makes it easier to generate these types of molds.
This method will not work for objects which must be exposed to heat or which will come in contact with food. If you’re looking to do that, my recommendation is to print the shape of the final object, create a sand mold (for metals) or use a food safe epoxy/silicone to create molds for food objects.